
Overview#
Applyer watches company career pages and scores every new role against a profile. For the roles you pick, it prepares a tailored CV, a cover letter and a short email to the right person. After that it reads the replies and keeps a tracker up to date.
It runs on one Mac. It can also fill in application forms, but I keep that turned off. I built it with Claude and Codex. I made the product and design decisions.
The problem#
Applying for a job is mostly admin. You find the posting, rewrite the same CV again, write a letter, and later try to remember who replied.
Tools that automate this have two problems. They send many generic applications. And when you ask a language model to improve a CV for a job posting, it can add a tool the person never used or a number they never reached, because that makes the text match the posting.
I wanted to see if an assistant could do the admin and still only write true things.
Three rules I set#
- Honest. Every sentence in a generated document has to come from something the person said or did. Anything else is flagged before approval.
- Local. Everything is in one database file on the laptop. Passwords go into the macOS Keychain. There is a button to export everything and a button to delete everything.
- A person approves. Pressing Apply does not send anything. It prepares the documents. You apply yourself and then mark it as applied.
How it works, step by step#
- A role appears. A background worker checks a list of company career pages and saved LinkedIn searches. You can also paste any job link.
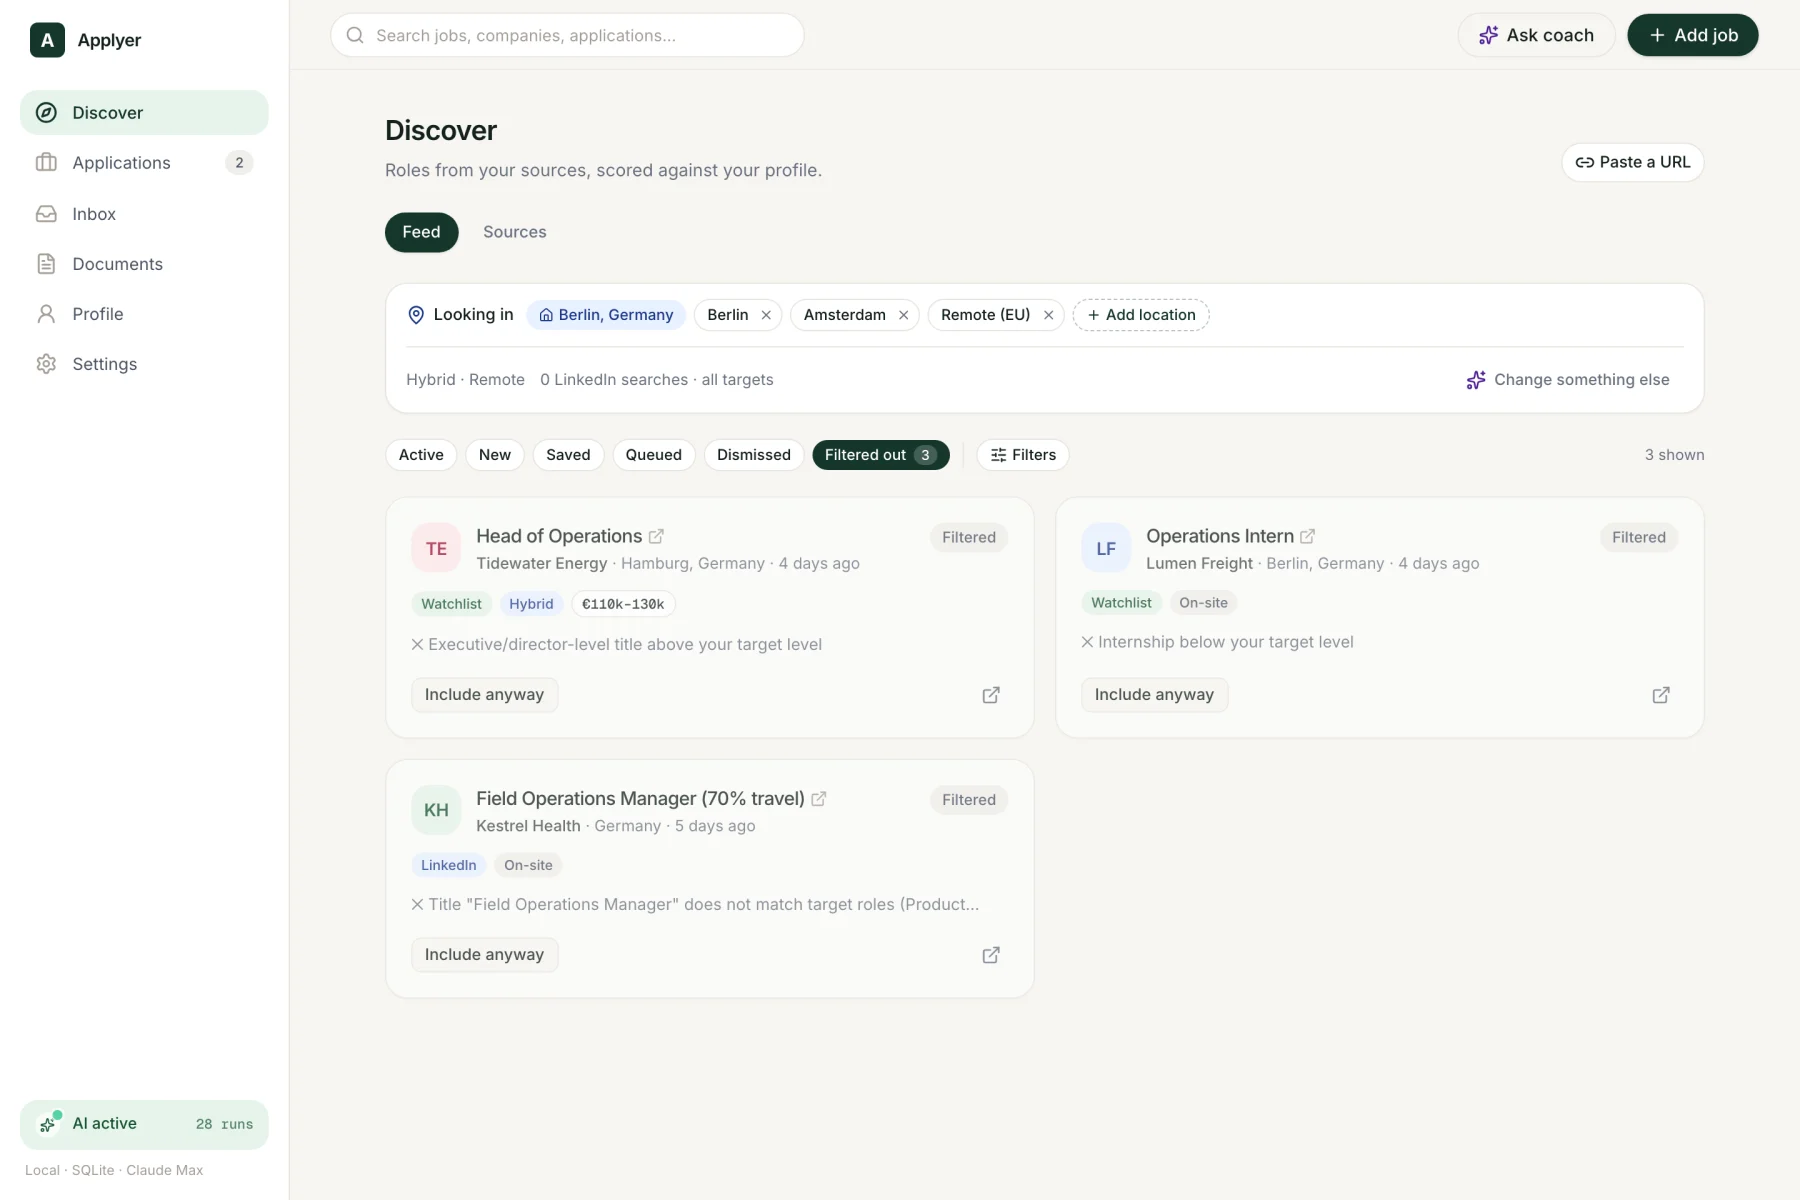
- Filters run first. This is normal code, no AI. It removes roles with the wrong title, wrong seniority, wrong country, on-site when you want remote, salary below your minimum, no visa sponsorship, or a language you do not speak.
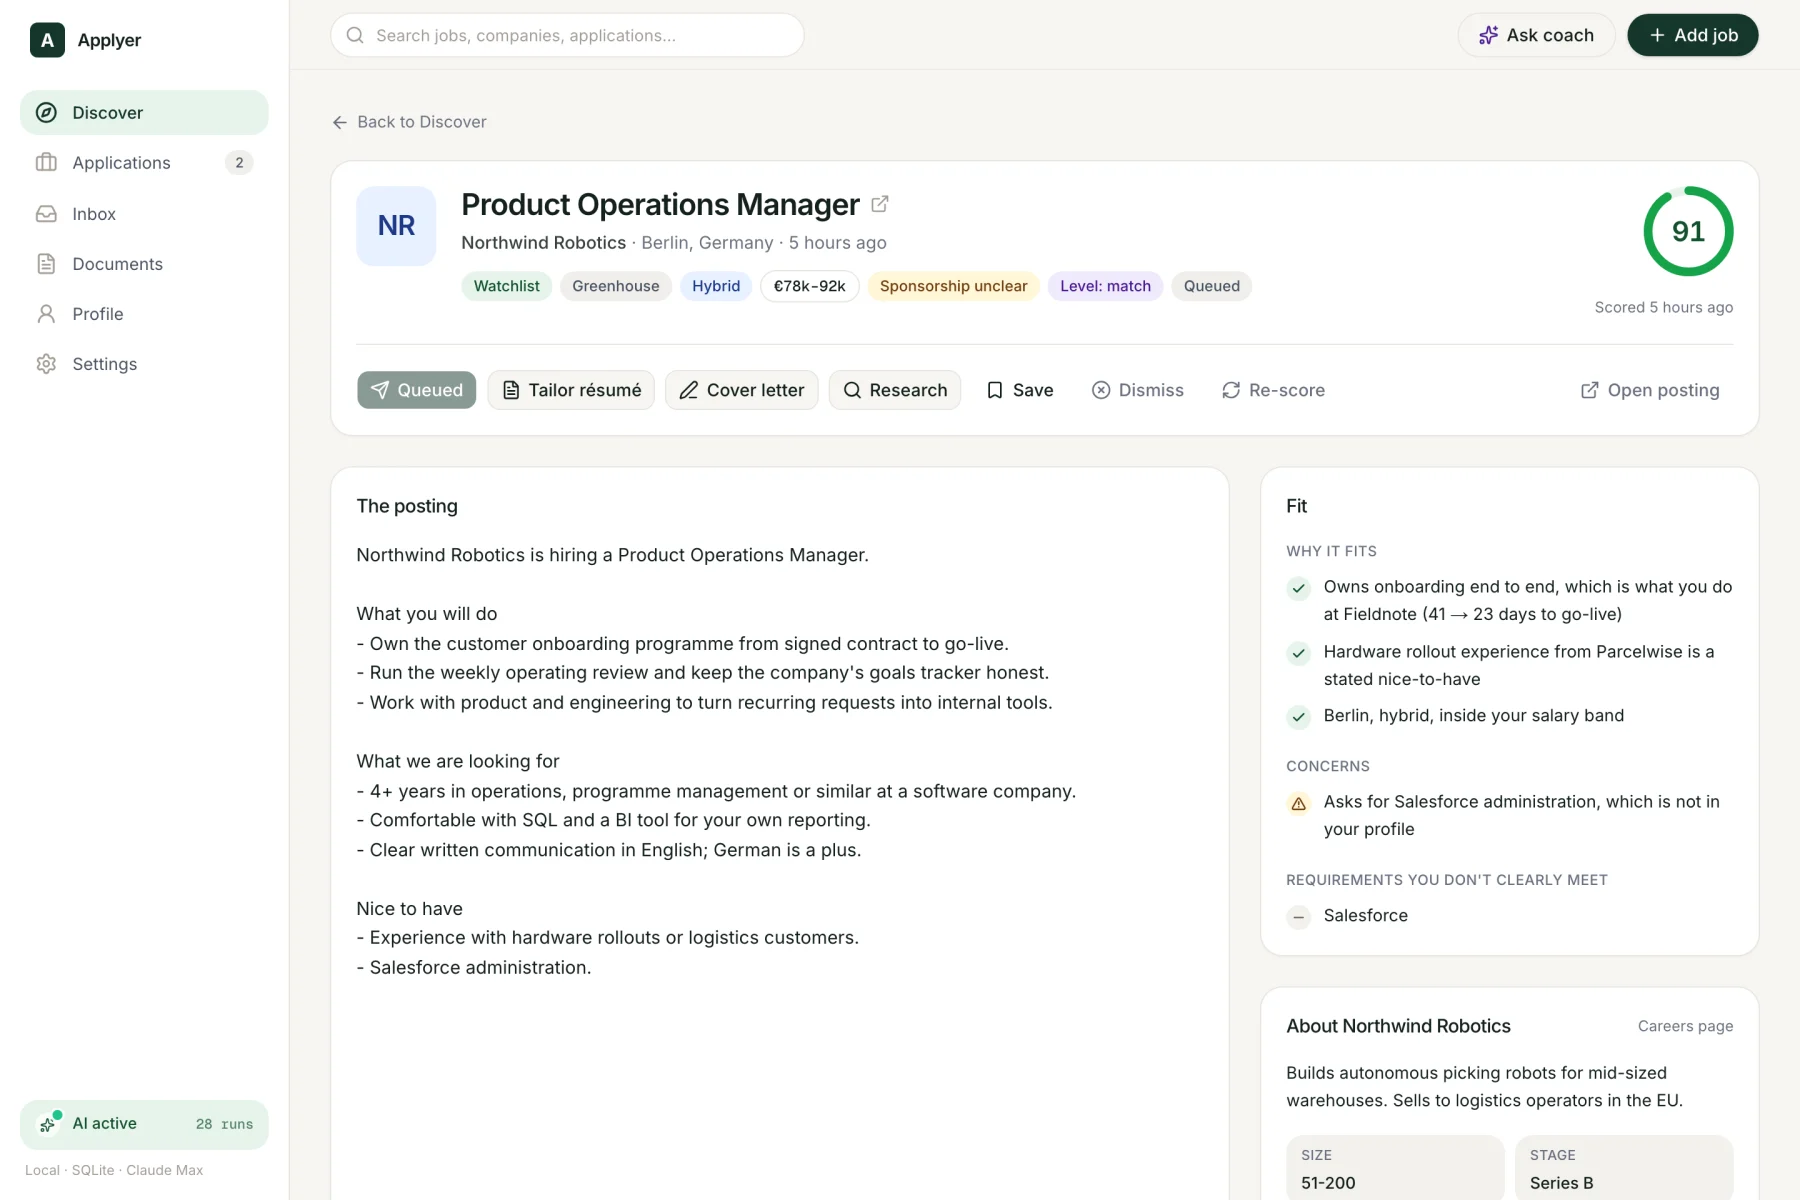
- The rest is scored from 0 to 100, with reasons, concerns and the requirements you do not clearly meet.
- You press Apply. The worker builds an application kit in four steps: company research, tailored CV, cover letter, intro email.
- The CV is fact-checked and you see a word-by-word comparison with the original.
- You apply on the company's site and press “Mark as applied”. The role moves to the tracker with its documents.
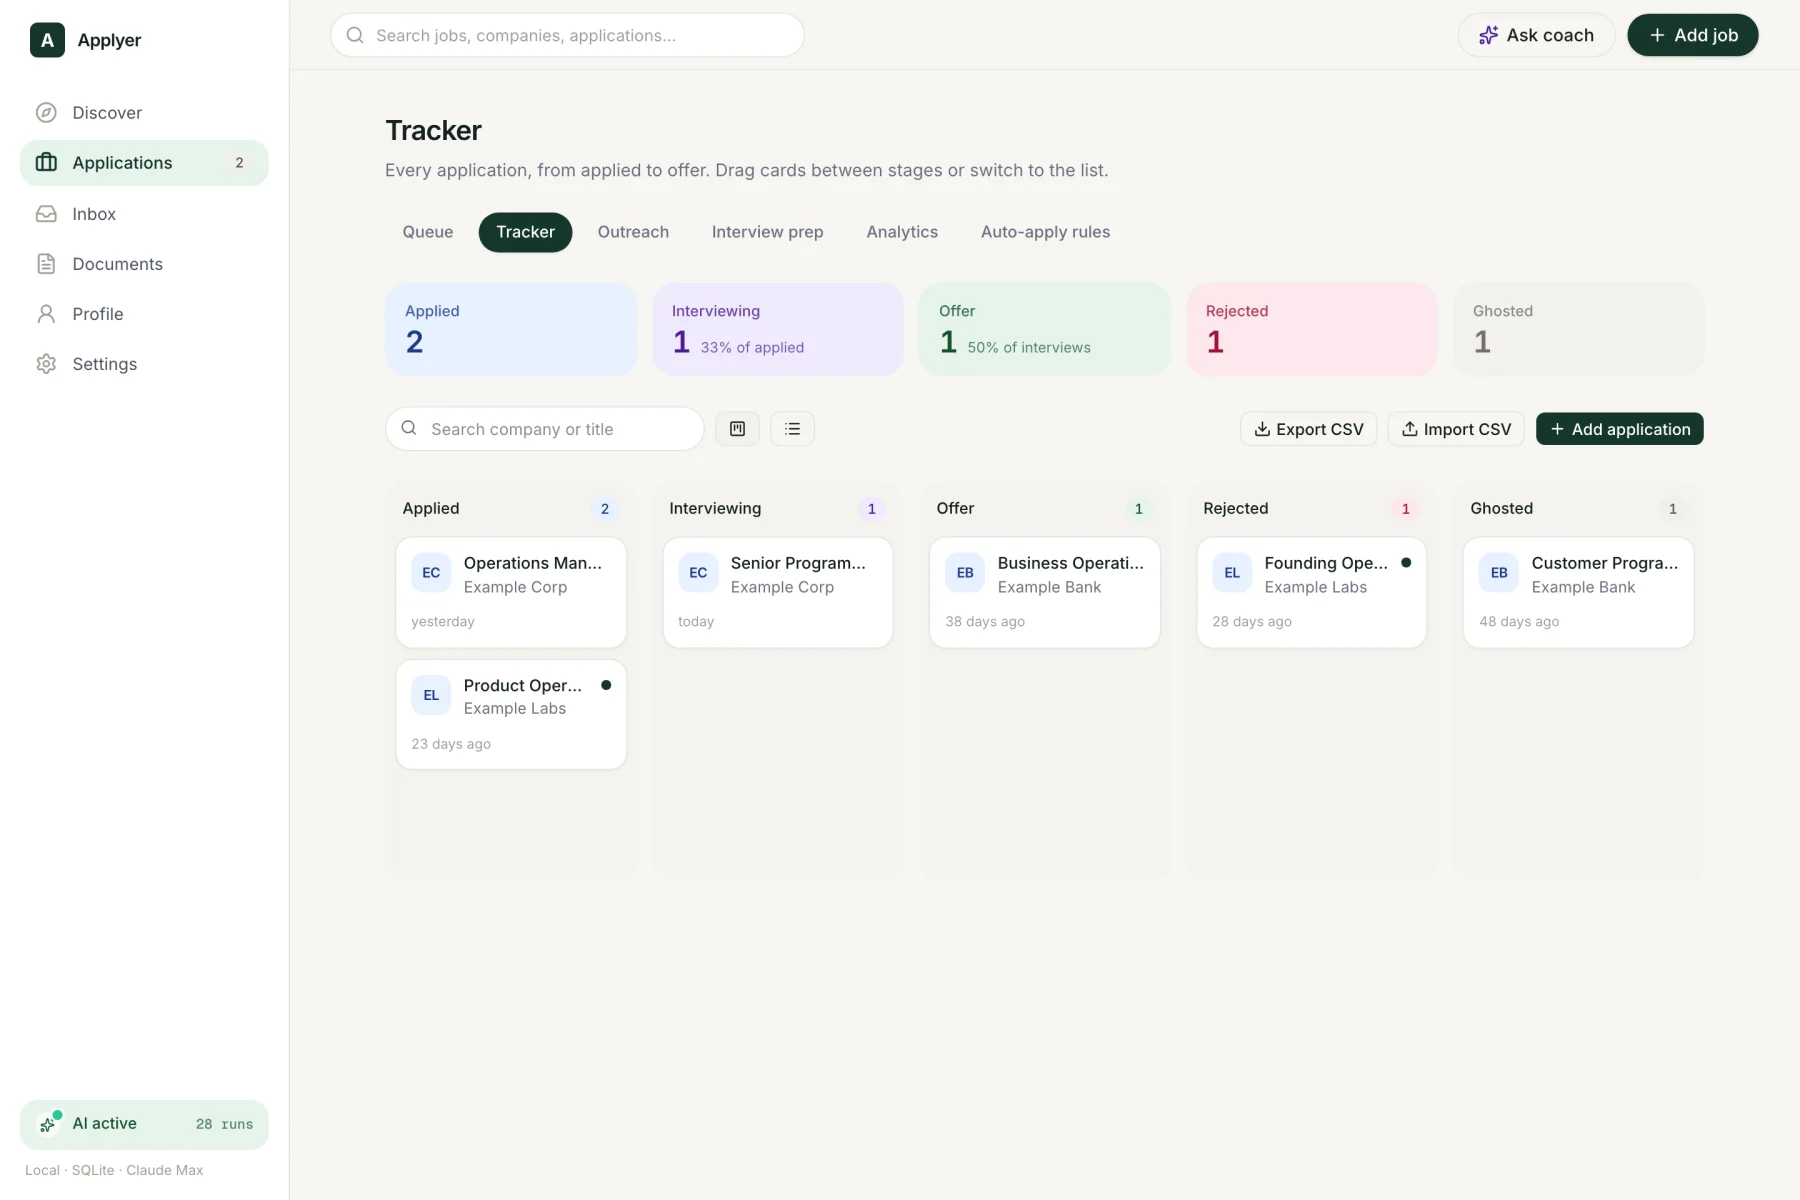
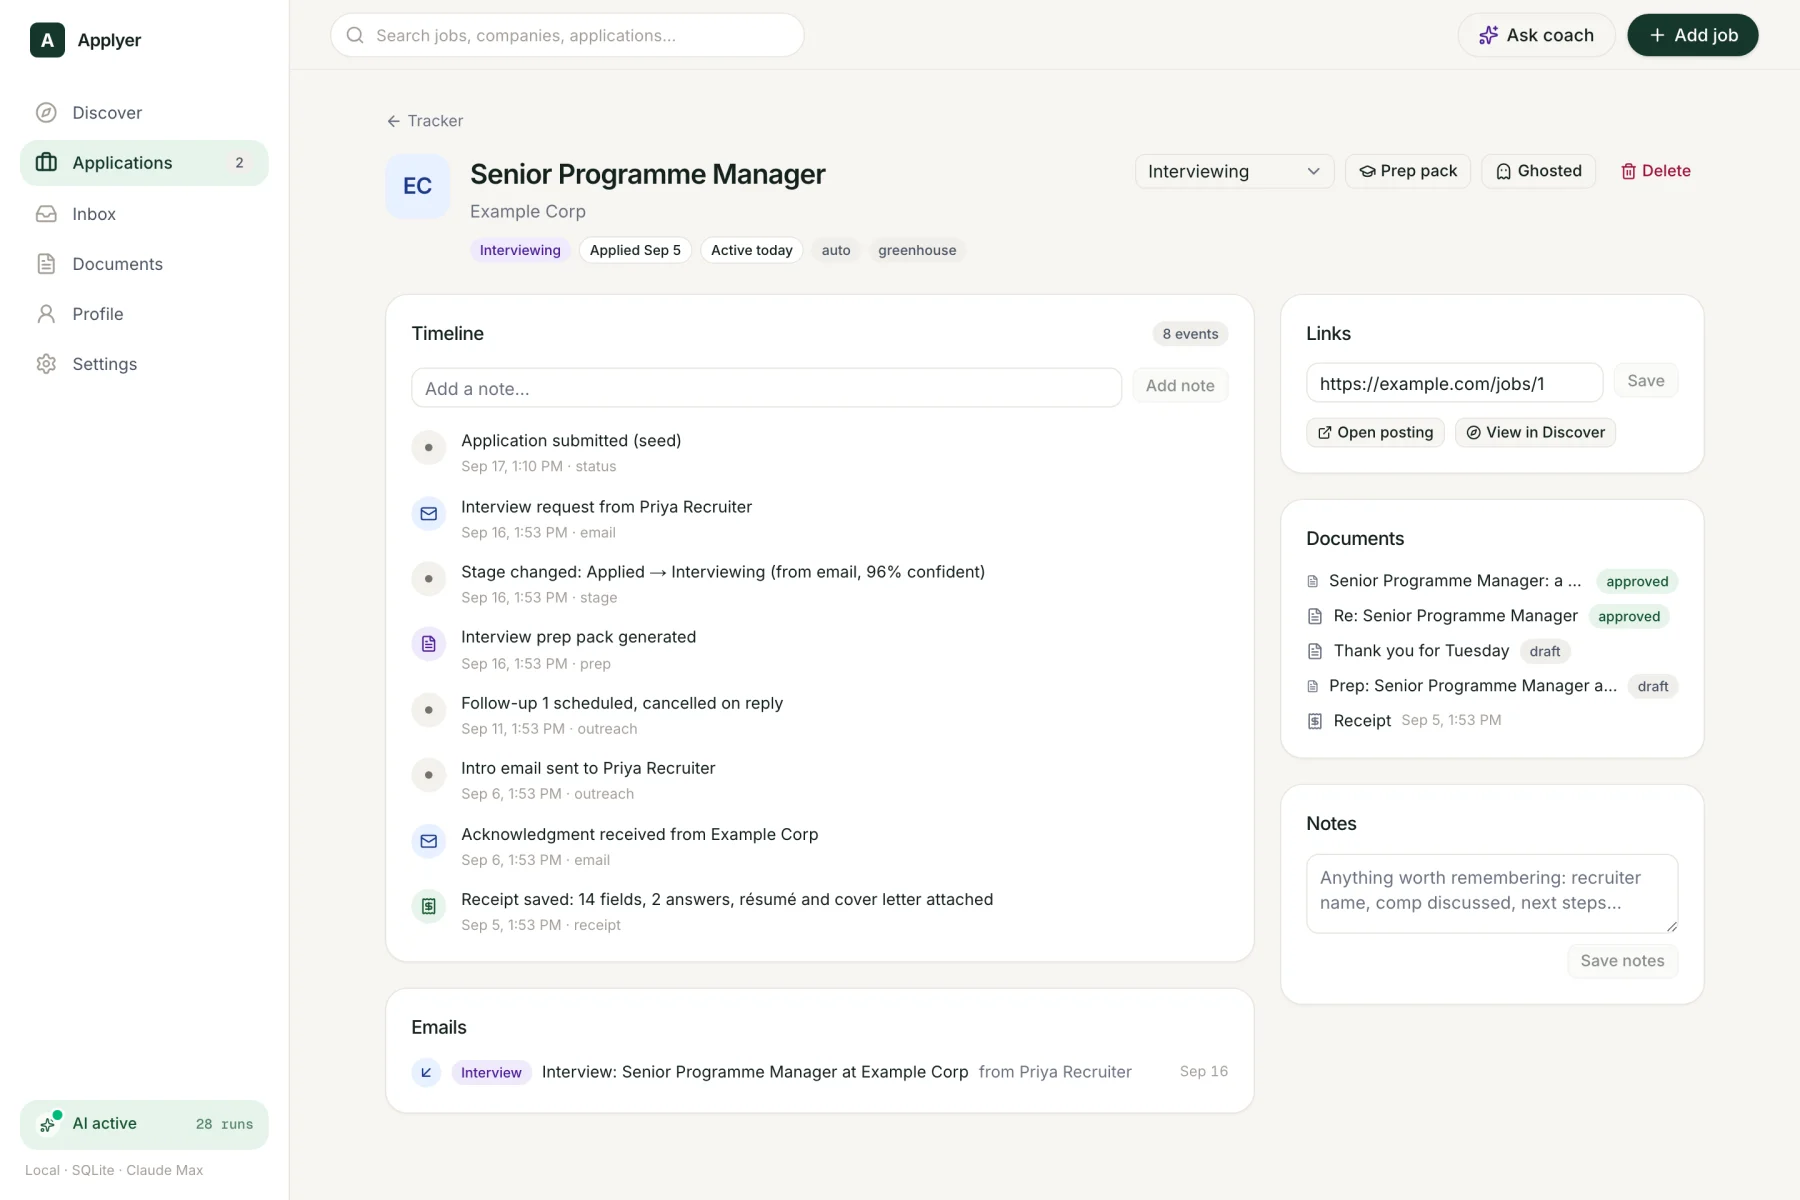
- Replies are read and sorted. An interview invite moves the card to Interviewing. A rejection moves it to Rejected. No reply for 21 days moves it to Ghosted.
Finding roles#
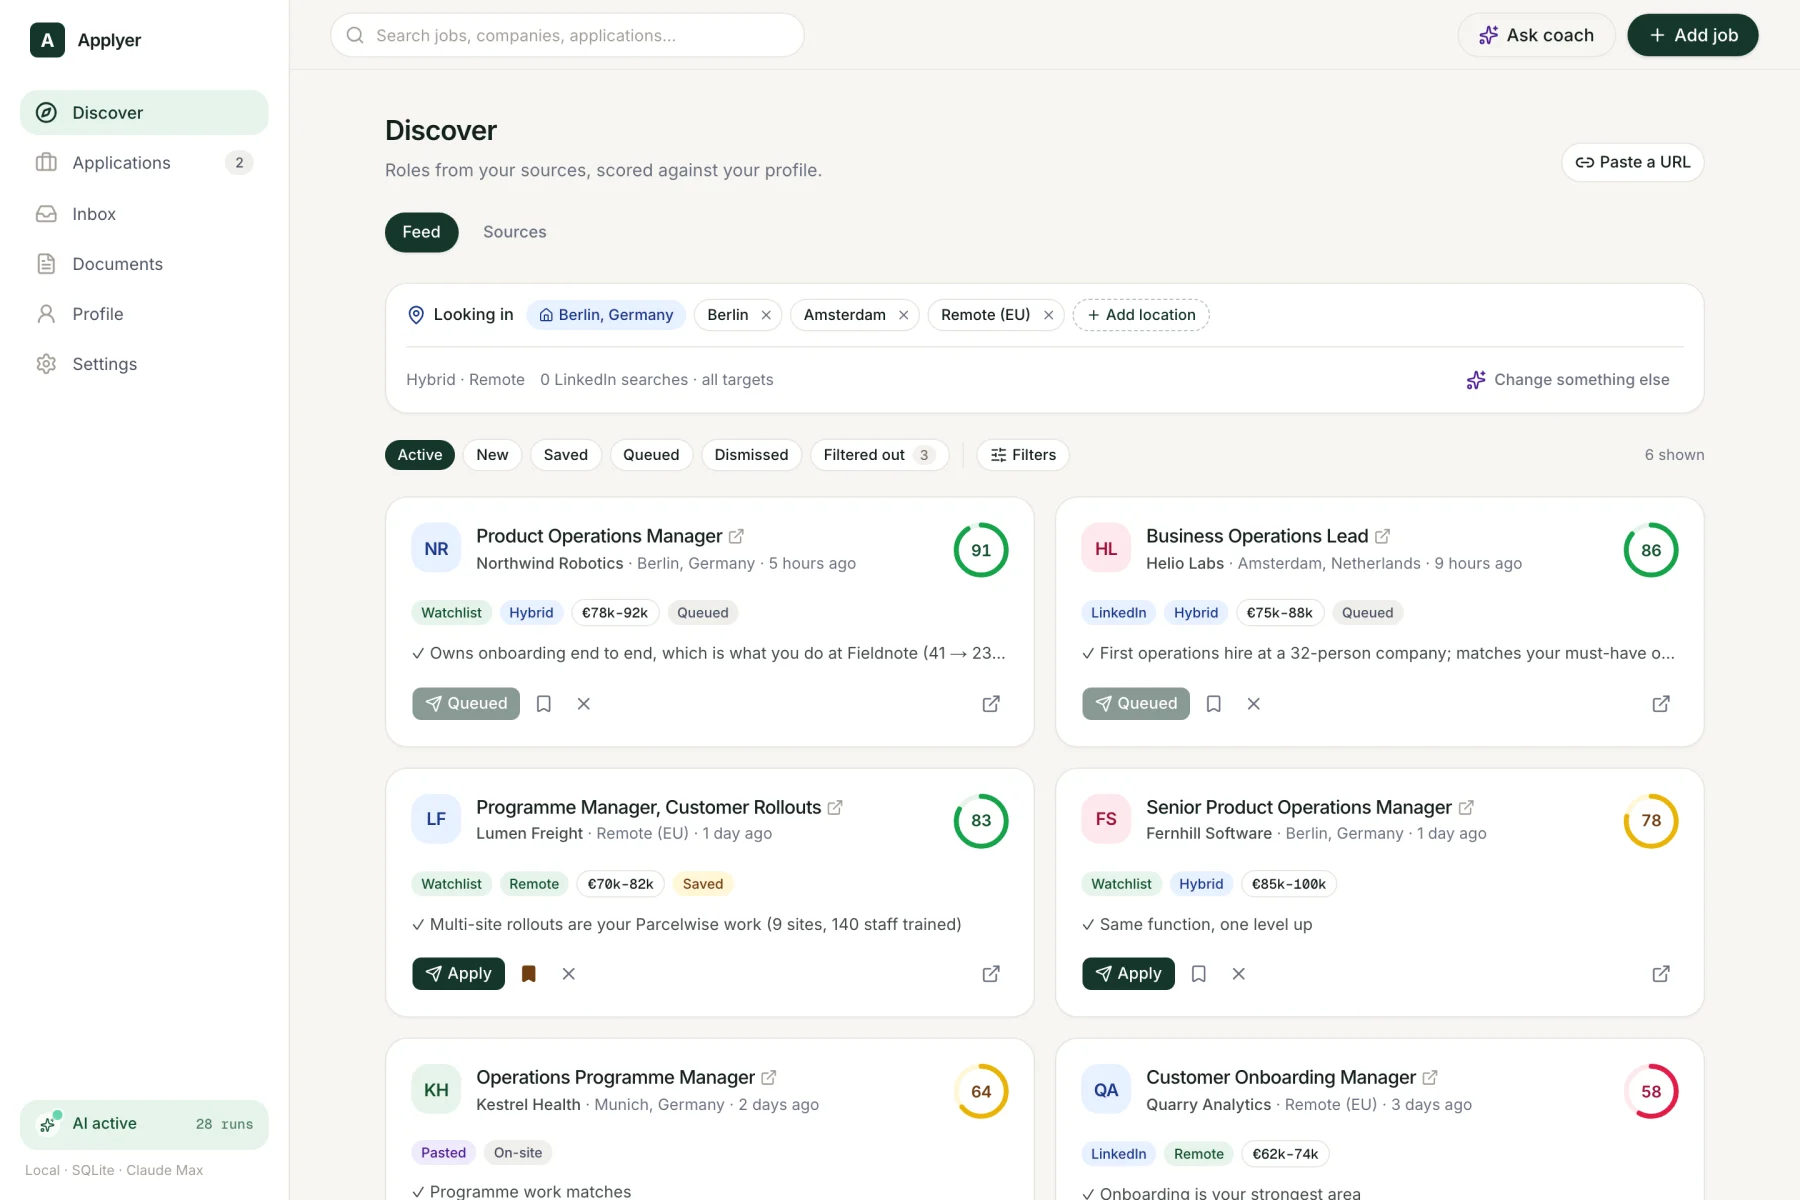
Each card shows the score, where the role came from, the salary if the posting gives one, and the main reason it fits. The scoring prompt asks the model to be strict. Most roles should score between 40 and 75. A score of 85 or more is only for roles where almost every hard requirement is met. If every role scores 90, the score is useless.
The application kit#
One page has everything for one application. Each part has Copy, Download, Edit, Regenerate and Discuss buttons.
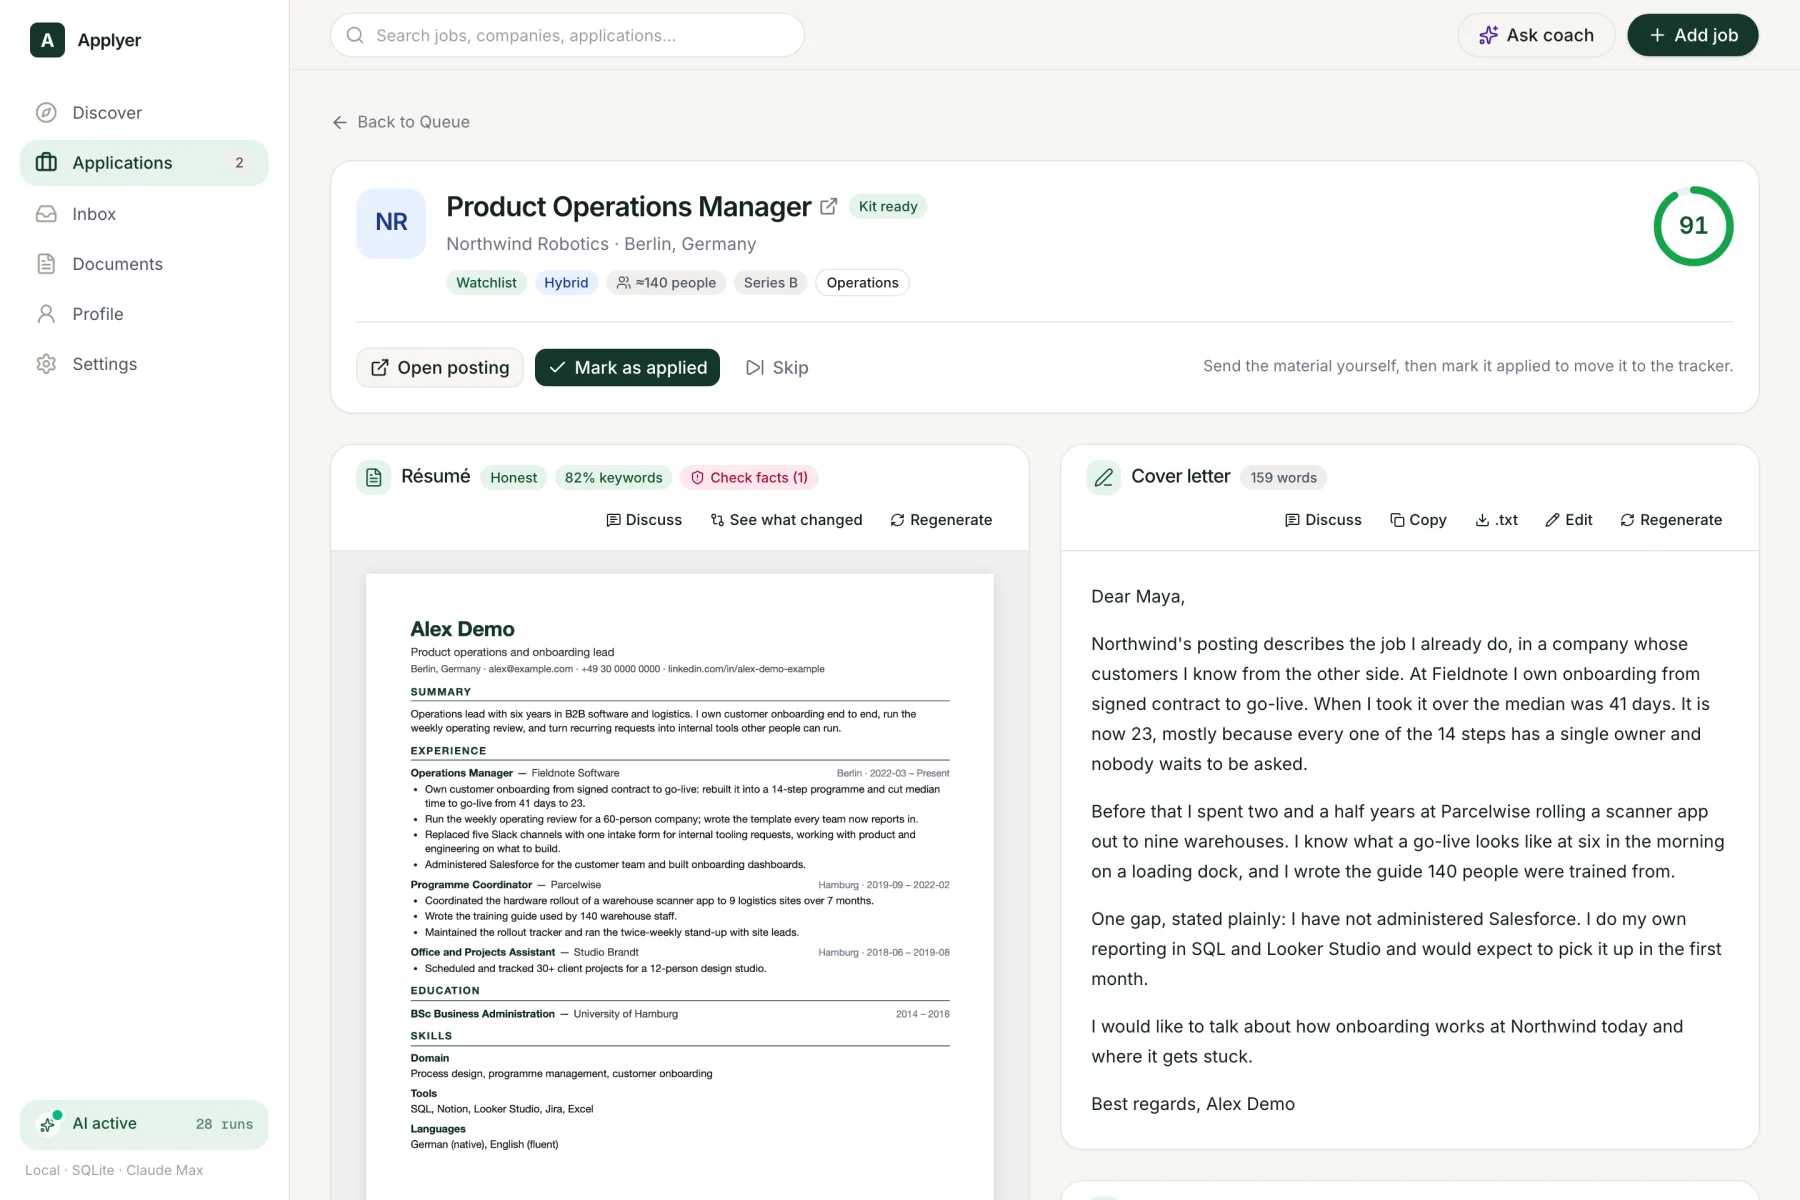
- The CV looks like your own CV. A template called Mirror reads the formatting of the CV you uploaded, like fonts, headings and date alignment, and uses the same formatting for the tailored version.
- Three tailoring modes: Off, Honest and Aggressive. Honest only rewords what is already there. Aggressive pushes harder on keywords, and that is why the fact-check exists.
- The email goes to a real person or to nobody. At a company of about 200 people or fewer it is addressed to the CEO or a founder. At bigger companies it goes to the head of the hiring department. Only names found on the web are used. If no name is found, you get a neutral greeting and a search link.
- The cover letter can admit a gap. In the example, the letter says the candidate has not used Salesforce.
Keeping it honest#
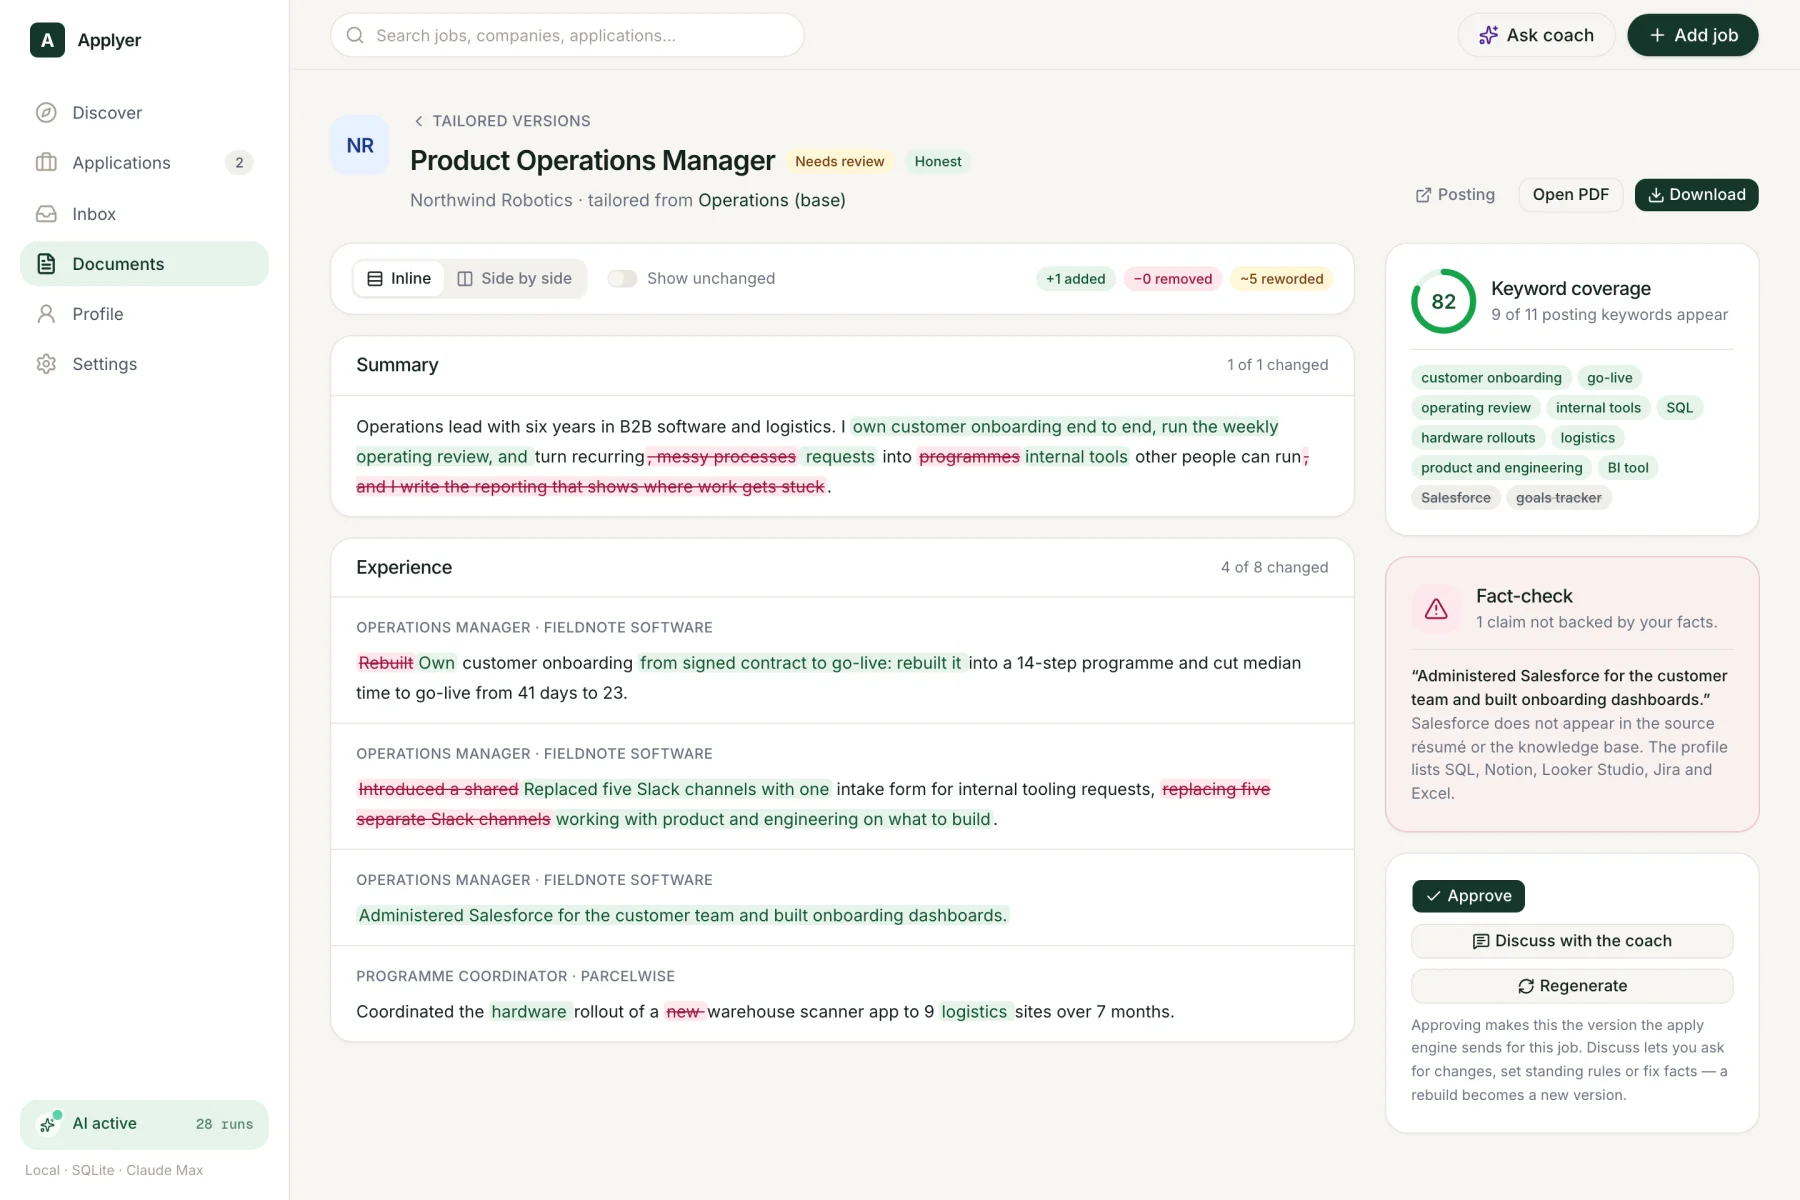
I added one false line to the demo data by hand to show how this works. The posting asks for Salesforce, so the tailored CV has a new line: “Administered Salesforce for the customer team.” The person never did that.
The fact-check
After tailoring, a second model pass compares every changed line with the original CV and the knowledge base. The knowledge base is a list of confirmed facts collected during onboarding. Rewording, reordering and shortening are allowed. New numbers, new tools, bigger scope, new outcomes and new employers or titles are flagged. The kit gets a red chip and the explanation sits above the Approve button.
The coach
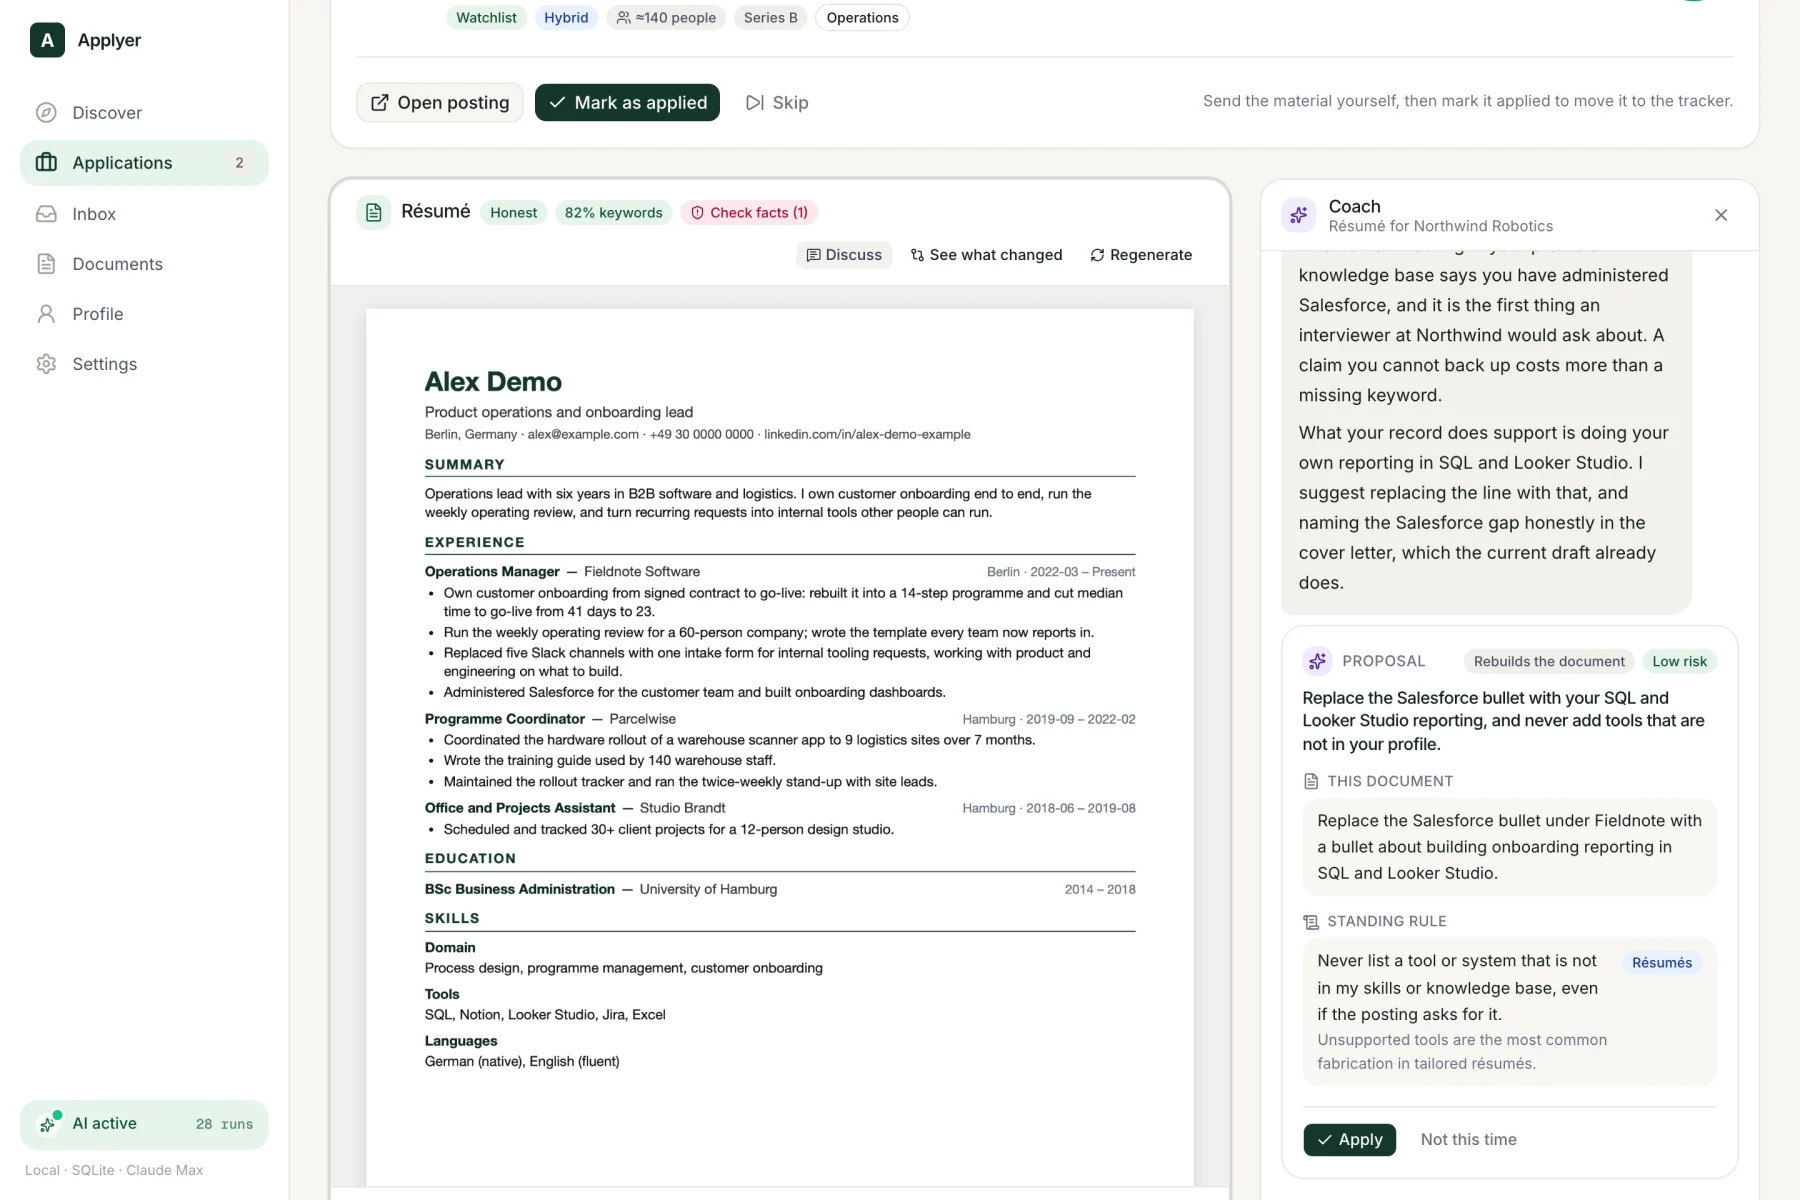
Every document has a Discuss button. You can ask for a change, give a preference or correct a fact. The coach checks each request against the knowledge base and says no when there is no support for it. It replies with a proposal card. Nothing changes until you press Apply.
Rules that stay
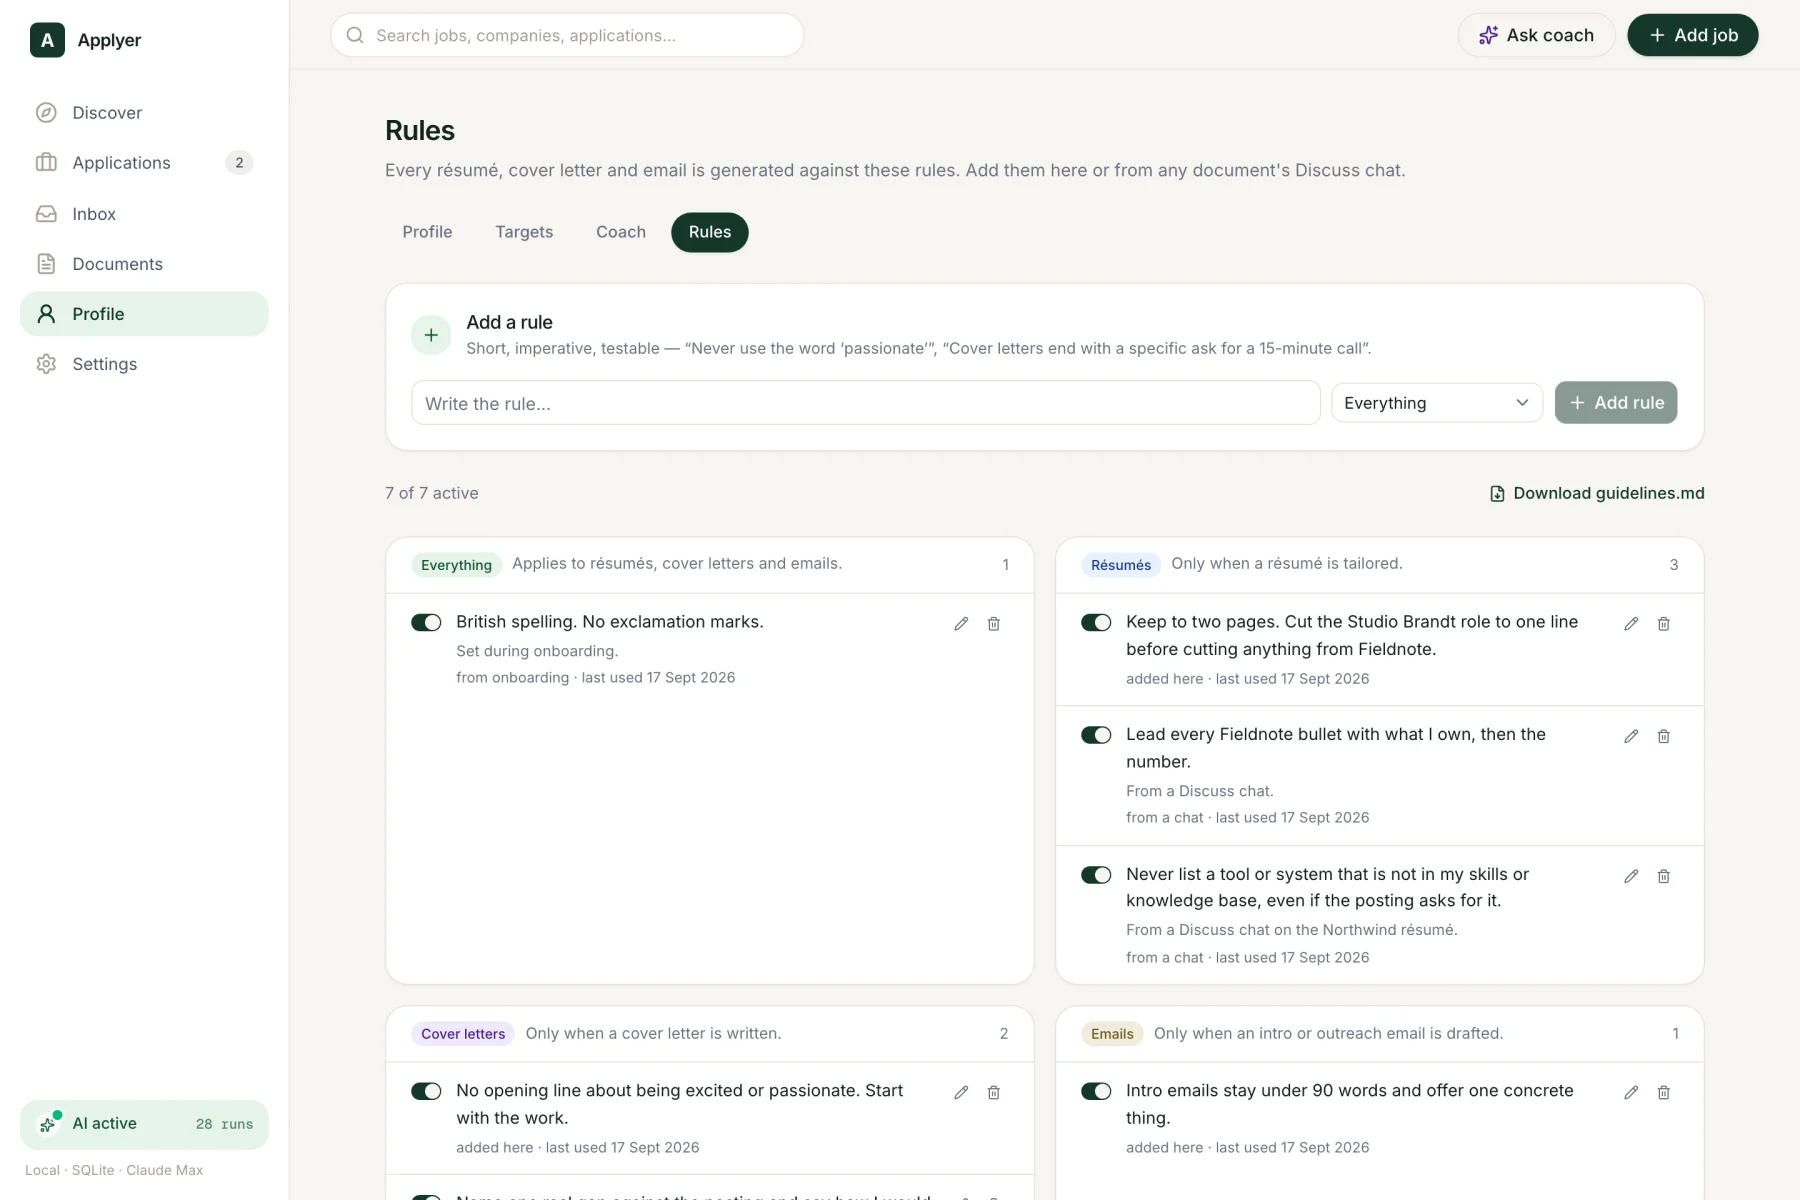
If you correct something once, you should not have to correct it again. Accepted rules go into a rulebook. Every later CV, letter and email is generated with these rules. The same rules are also saved to a plain text file, so you can read and edit them outside the app.
Voice Studio#
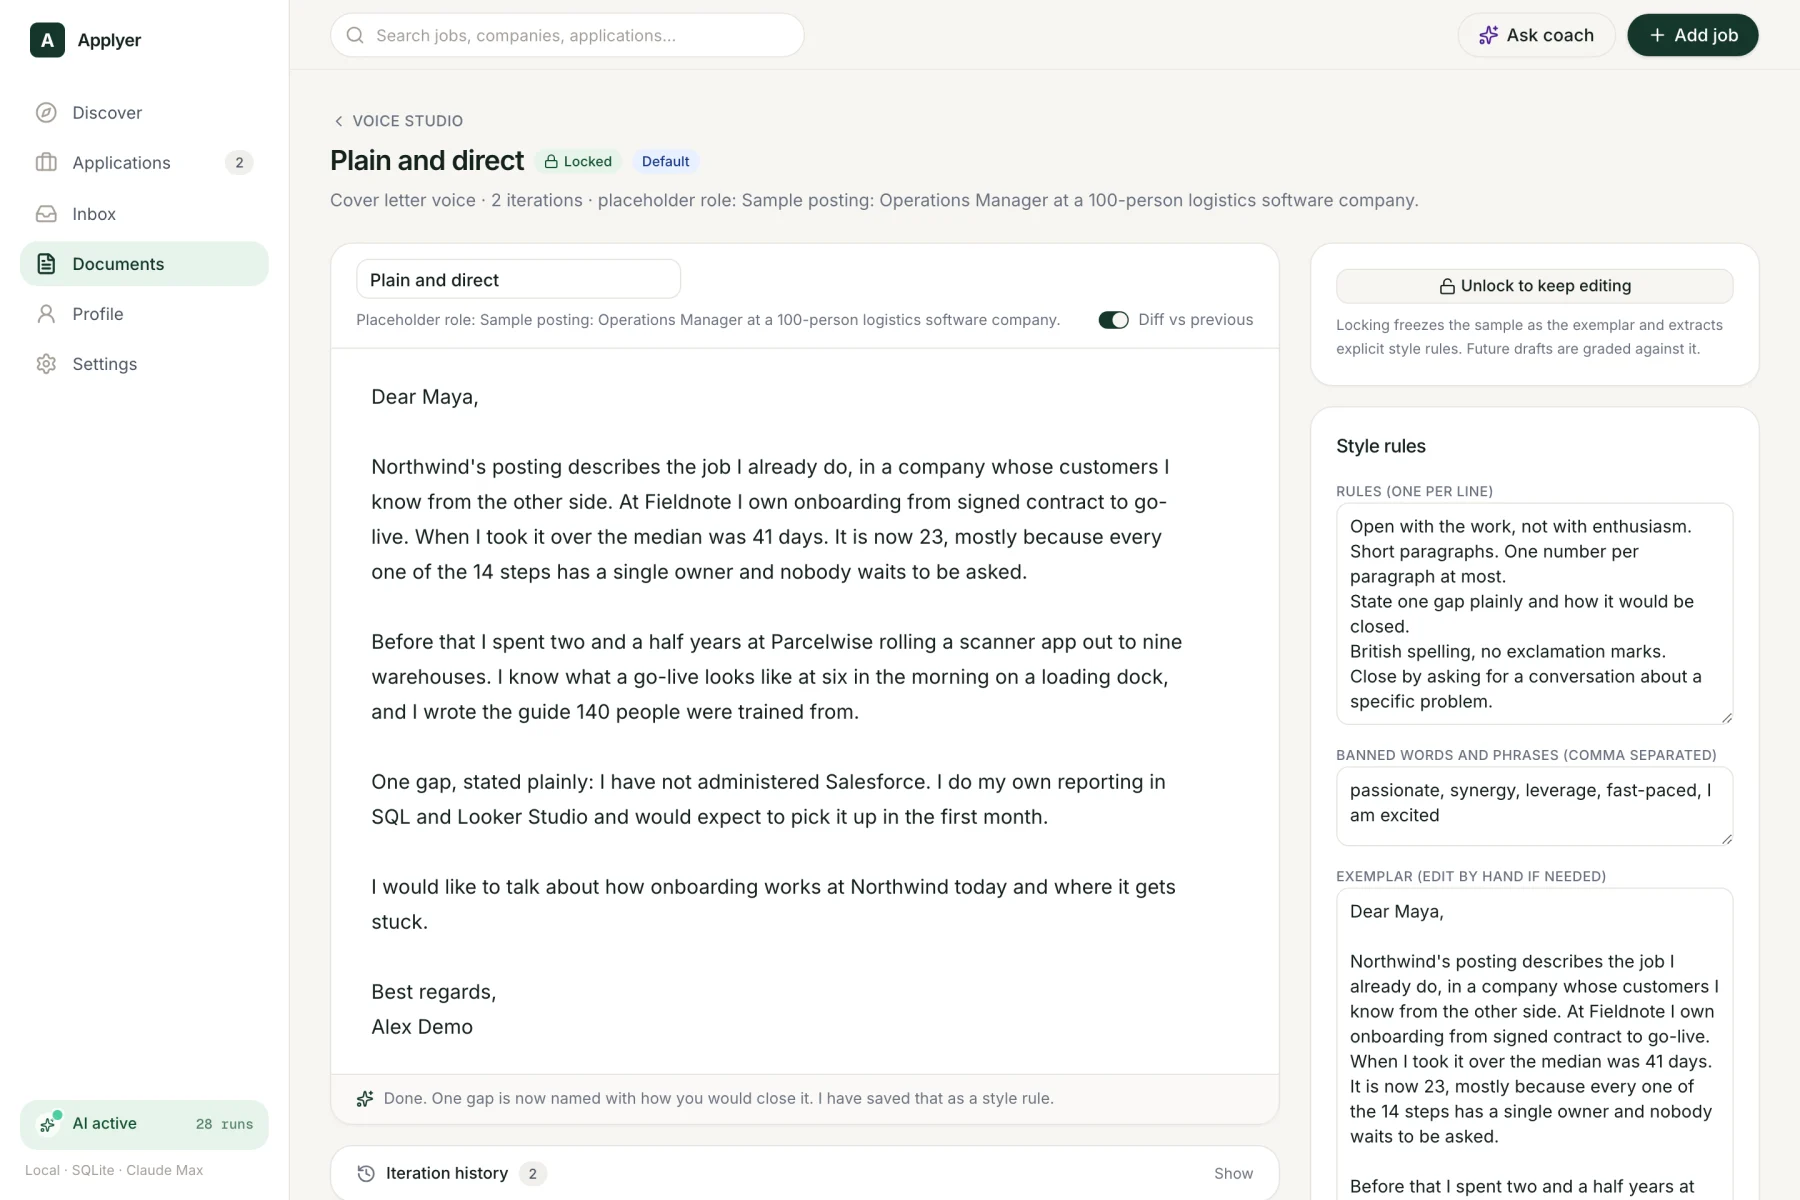
It is hard to describe your own writing style, but it is easy to say when something does not sound like you. Voice Studio writes a sample letter, you say what is wrong, and it tries again. When it sounds right you lock it. The locked sample and the style rules from your feedback are used for every document after that. Each new document gets a voice-match score.
Tracking replies#
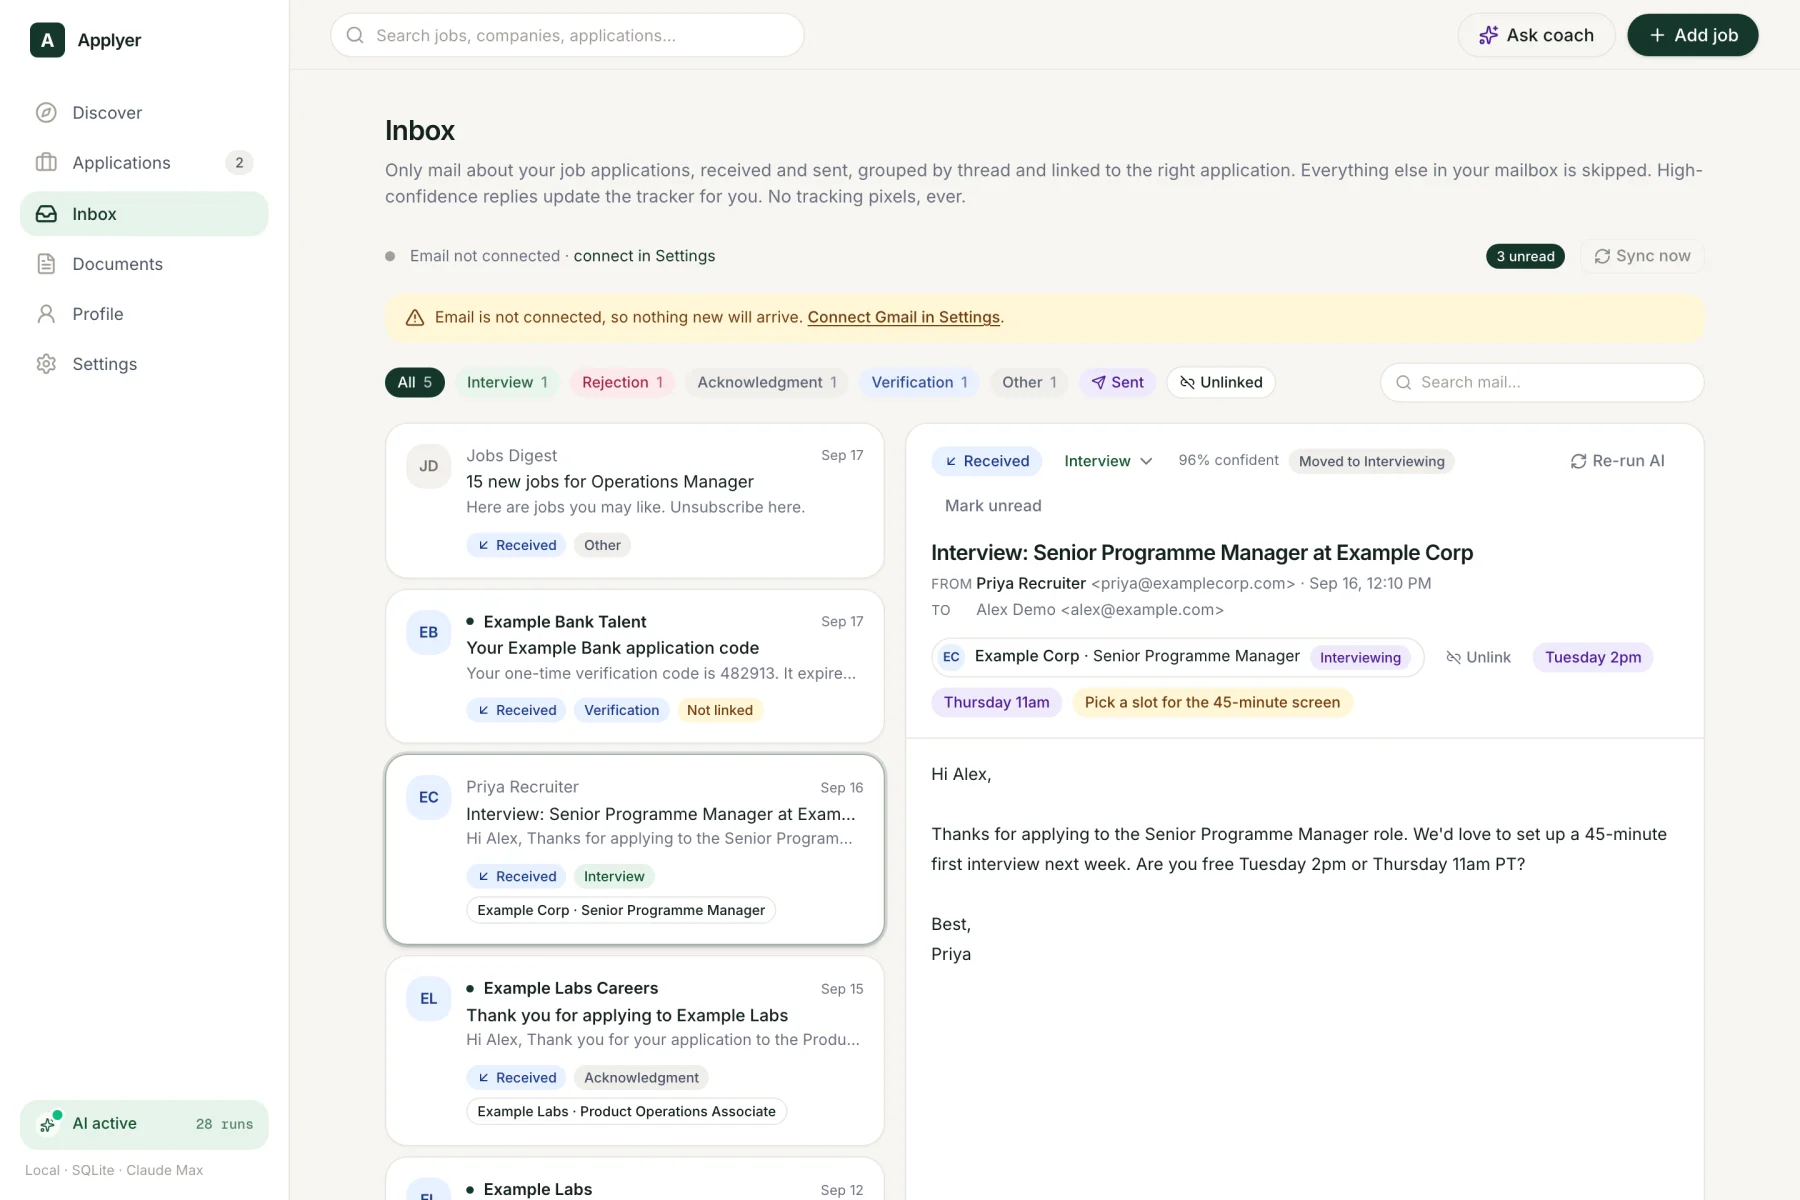
When a mailbox is connected, Applyer reads only the mail about applications. It sorts each mail into one of eight types: acknowledgement, interview, assessment, offer, rejection, reminder, verification code and recruiter outreach. When it is confident, it links the mail to the right application and changes the stage. When it is not, it does nothing.
Auto-apply rules#
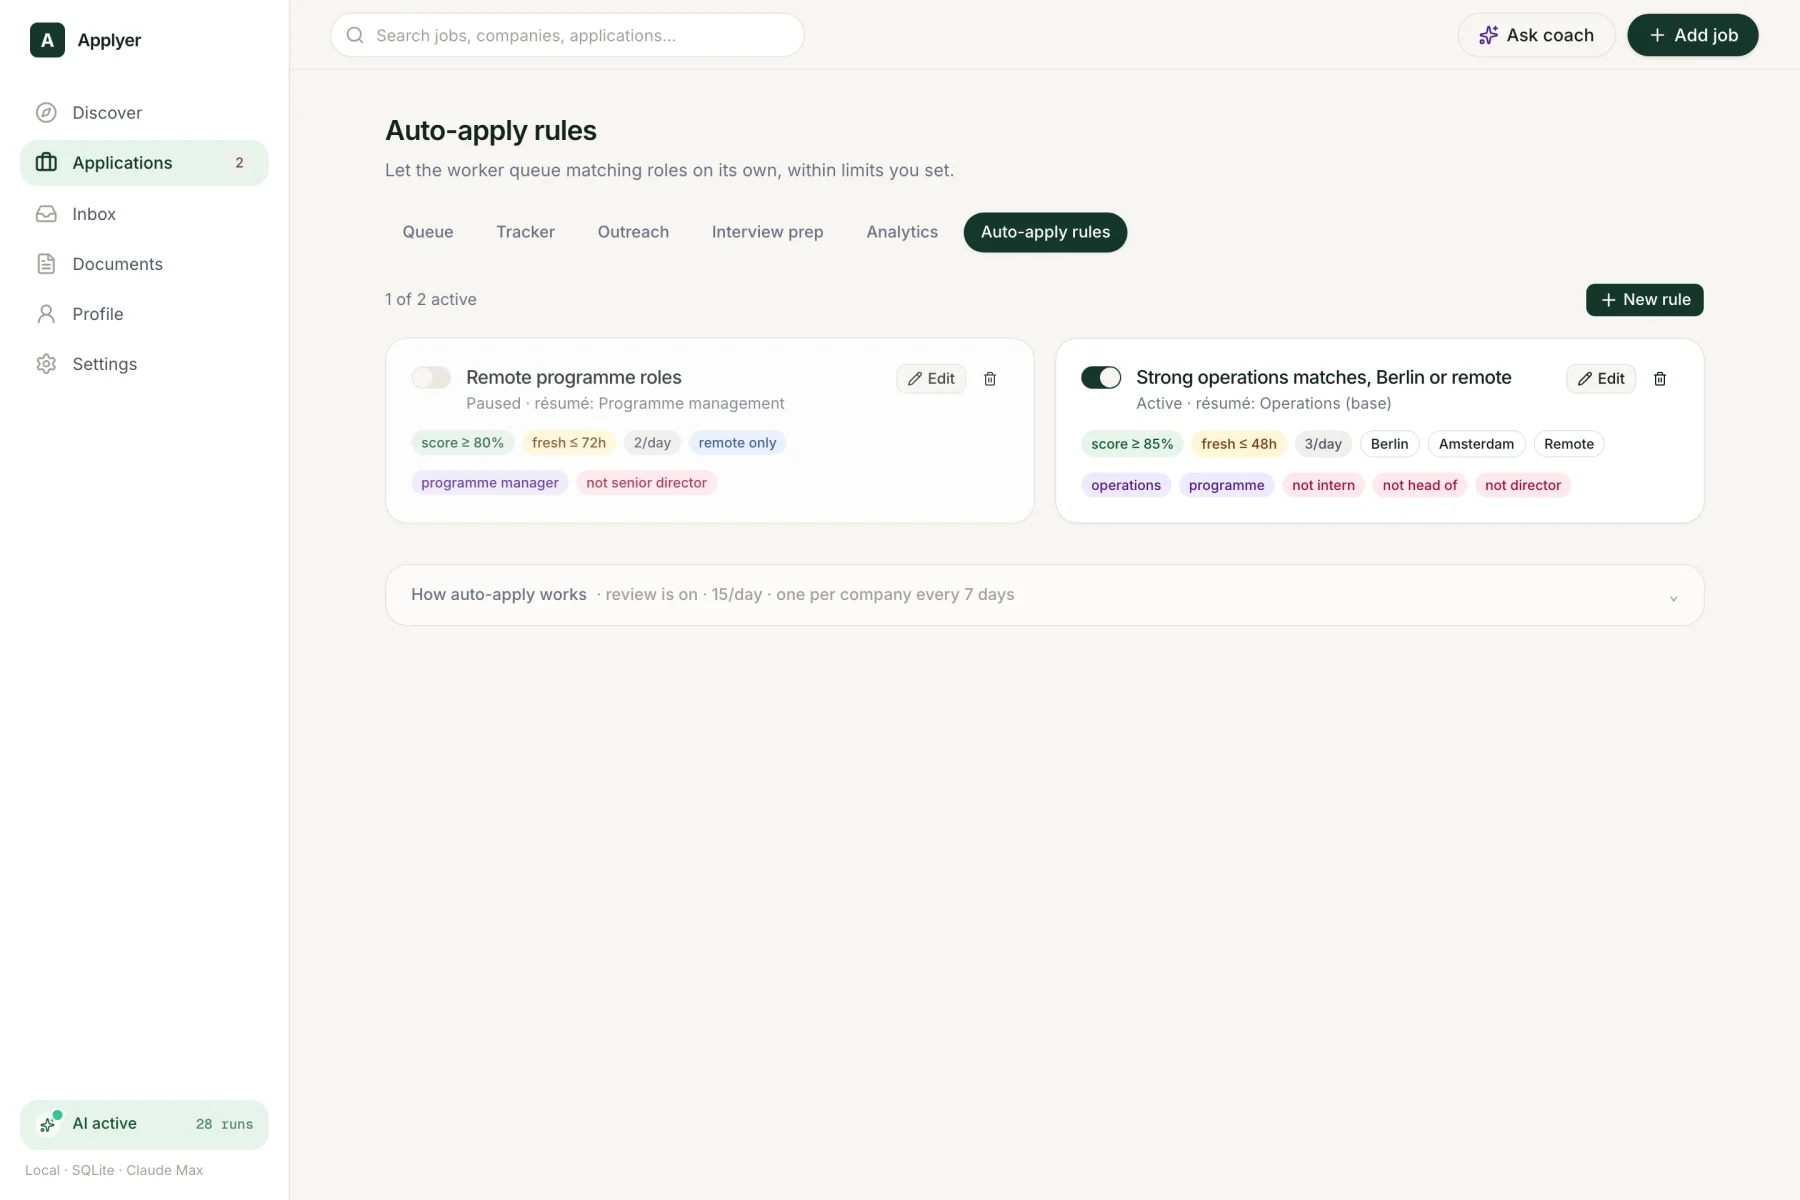
For roles that clearly fit, the kit can be prepared without asking. A rule sets a minimum score, how new the posting must be, words the title must or must not have, locations, and a daily limit. The worker checks open roles against the rules every ten minutes.
The name is “auto-apply” but it still only prepares the kit. The rule editor has a preview that uses the same code as the worker, so you see exactly which roles it would pick.
Which model does which job#
I did not use the biggest model for everything. The model is chosen by task.
| Model size | Used for | Why |
|---|---|---|
| Haiku (small and fast) | Sorting email, grouping skills, reading unusual career pages | Many small jobs |
| Sonnet (medium) | Scoring roles, the fact-check, the first read of an uploaded CV | Needs care, but the output is structured data |
| Opus (largest) | Tailoring, cover letters, emails, the coach, interview prep, company research | Anything a person will read |
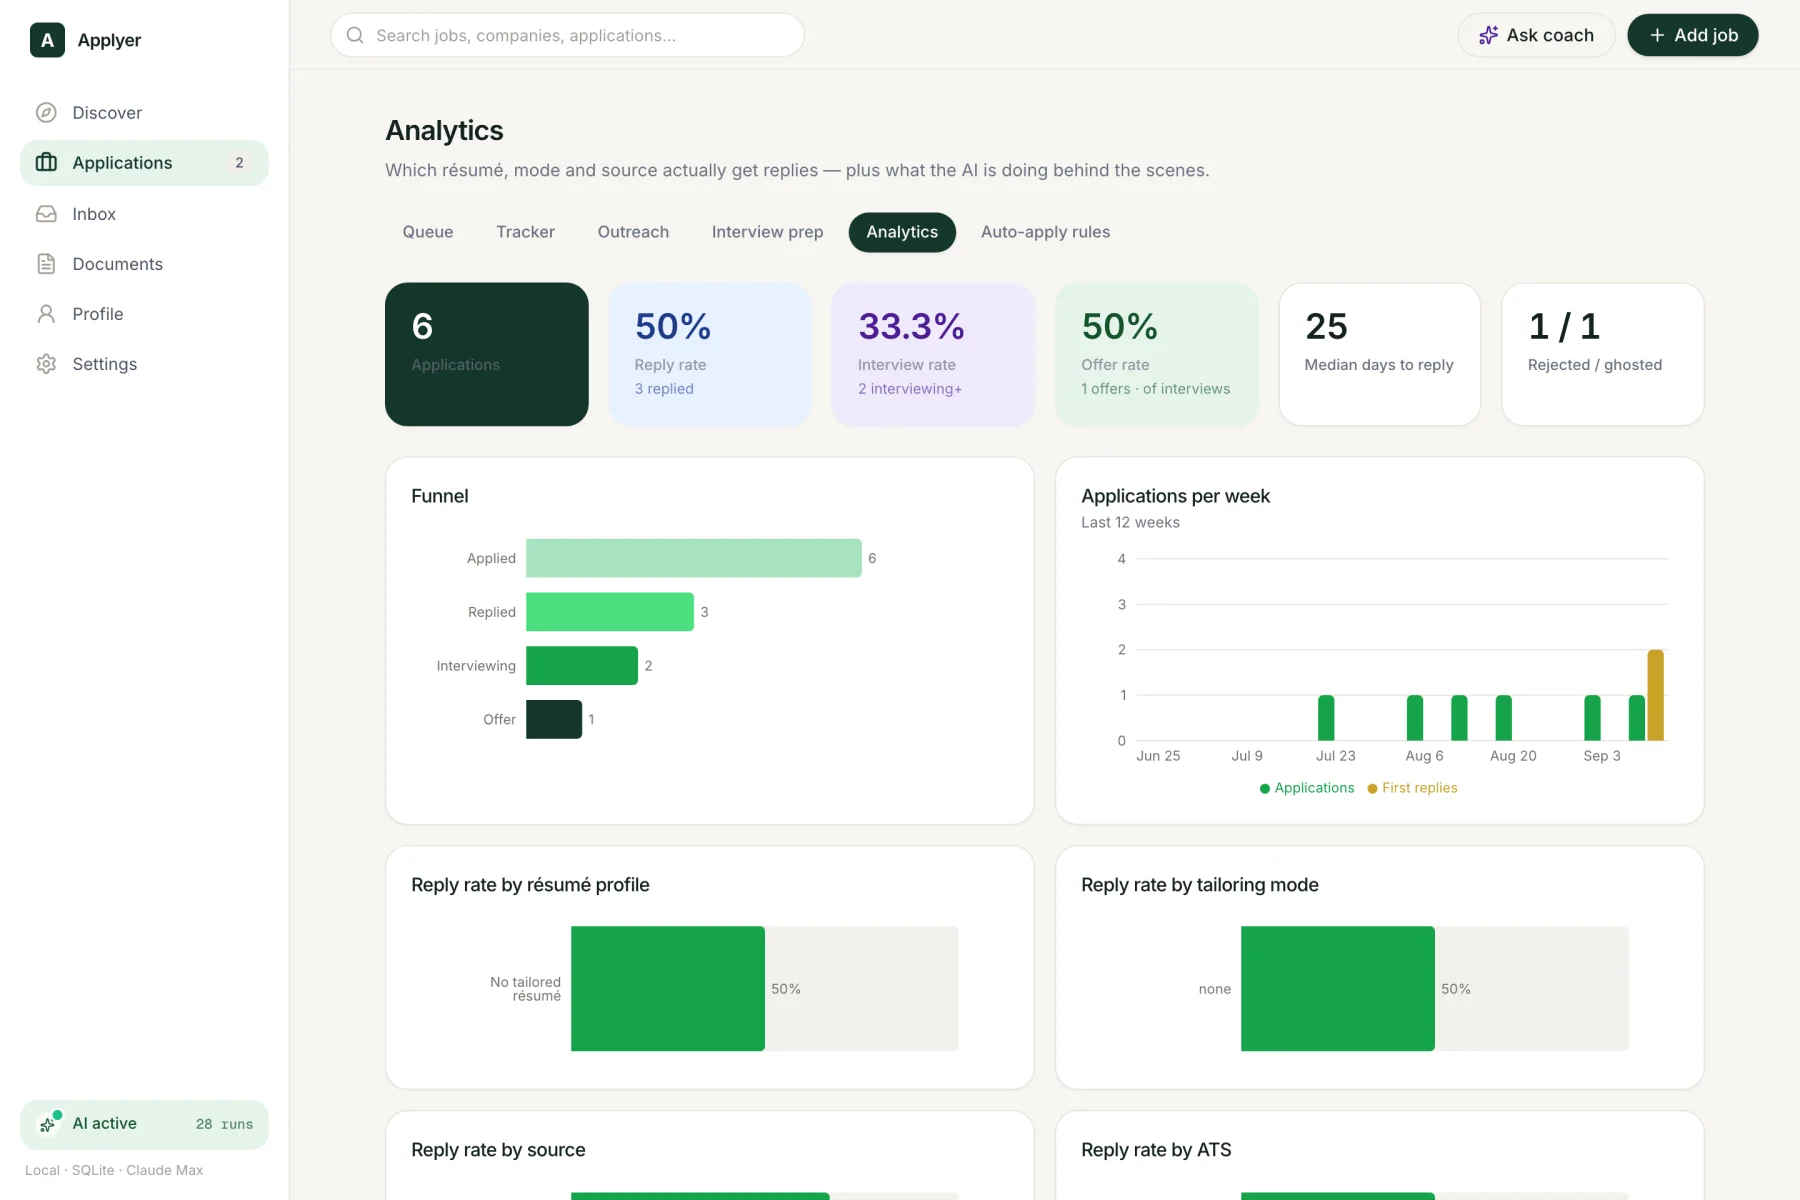
Only one file in the code is allowed to call a model. It forces every answer into a fixed structure, so a strange answer cannot break a screen. It also logs every call with its time and cost. The analytics page reads that log.
Why it uses my Claude subscription and not the API#
Applyer is a local app. It runs on my Mac and the data stays there. Normally an app like this calls the AI through an API, and you pay for API credits for every call.
I already pay for a Claude subscription. I noticed that a big part of it was going unused. I use up all my Fable usage every week, but my Sonnet and Opus usage was mostly untouched. Applyer mainly needs Sonnet and Opus. So I connected the app to my subscription.
The app does not have any API keys. It uses the Claude login that is already on my Mac, through the Claude Agent SDK. Every call is still logged with its time and cost, so I can see what the app is using.
Now I don't spend money on extra API credits. I would much rather put that money into the subscription, because for the same money the subscription gives a lot more usage than API credits do. For an app that only I use, this is the more efficient setup.
Every person, company and application in these screenshots is made up. “Alex Demo”, Northwind Robotics, Example Corp and the others were added to an empty test database. The app was never connected to real data for this page.